Red Cine X Tutorial
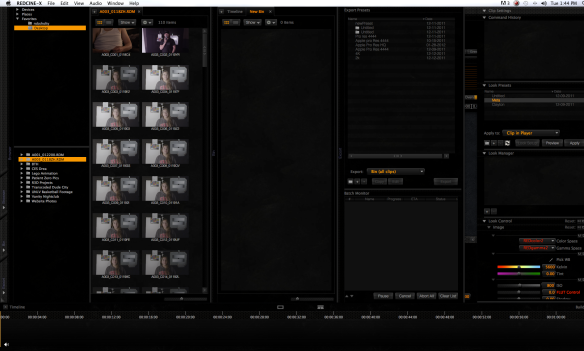
Open up Red Cine X and you will see an interface like this.
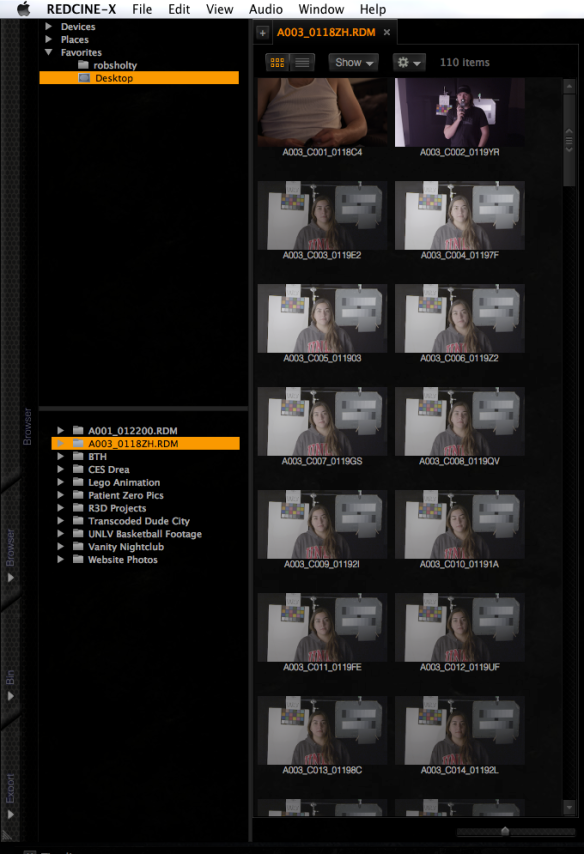
On the far left side is the BROWSER. The browser window is where you will see all of your media. The upper left hand window is where you will pick the drive you are pulling files from. When you choose your drive whether it be internal, external, or from your desktop the second browser window will populate with your folders. You can now choose the folder with your RED files. When you click on that folder or a specific file they will populate in a vertical browser window.
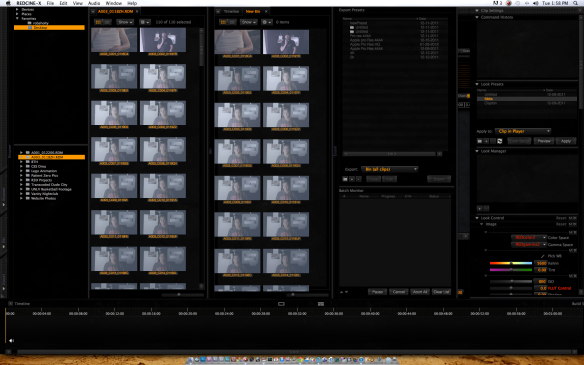
From here you can either hit Command-A to select all the clips or you can choose individual clips and drag them to the bin window .
Now that your files are in the bin window you can now either do a light color correction with them using the tools in Red Cine X or you can export them for a variety of different things including Quicktime exports for editing programs, DPX (Digital Picture Exchange) for Digital intermediate and high end color grading, and JPEG/TIFF for still images from your footage.
For now we will create two flavors of quicktime which can be used easily in Final Cut Pro. For the examples I will use Apple Pro Res 422 (HQ) but for more in depth color work inside Final Cut Pro you can also use Apple Pro Res 4444. The difference between the two is in the color space. For example Canon 5d Mark II captures image at a color sampling ratio of 4:2:0. Some other cameras such as the Arri Alexa can capture images RAW or the Apple Codec Pro Res at a color sampling of 4:2:2. Some high end cameras capture at a sampling of 4:4:4 which is a very high color sample. The RED and Arri both can capture RAW which is not set by color sampling since its capturing RAW metadata that can be used to manipulate the entire image in post.
So the first thing we will do is set a preset for all of our footage to be transcoded.
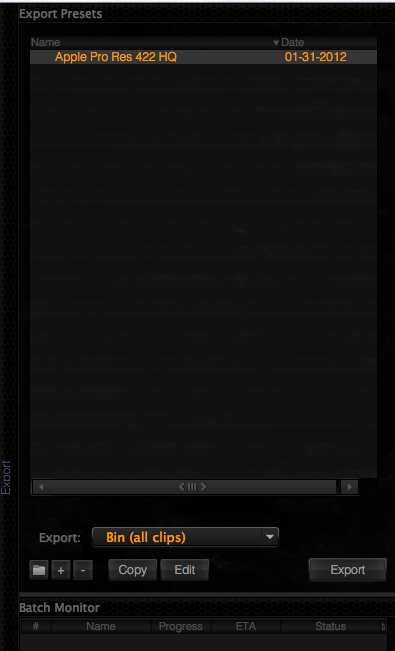
Click on the + Sign that is in the Export window and this will bring up a new window in which you will create your preset for exporting.
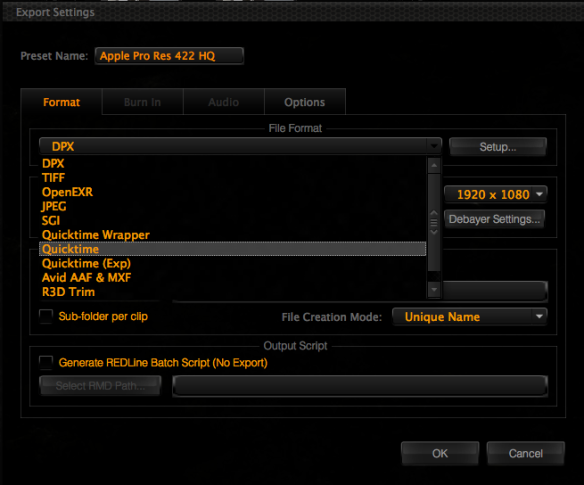
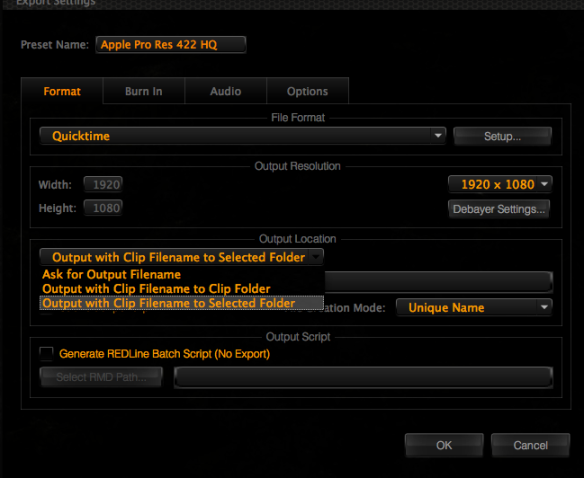
From the window menu name your preset Apple Pro Res HQ then click on the File Format tab and click on Quicktime.
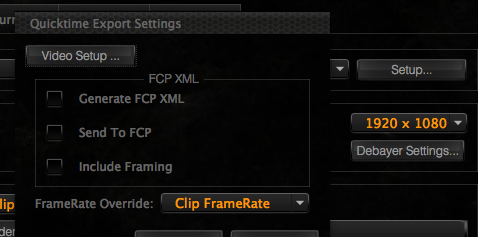
After this click on Setup and then Video Setup.
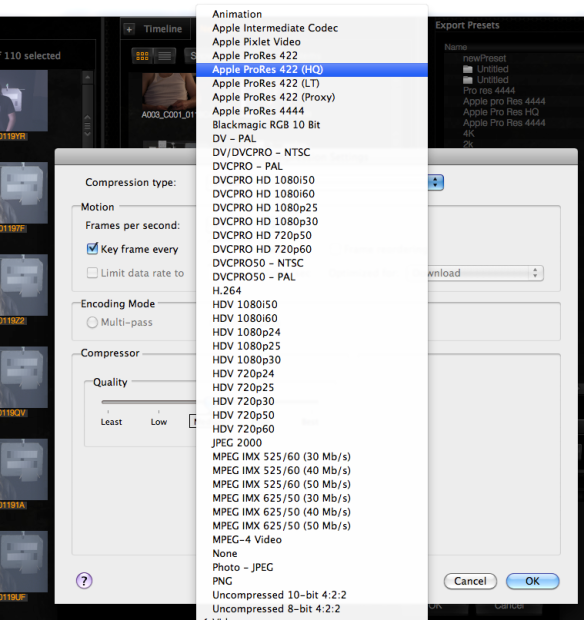
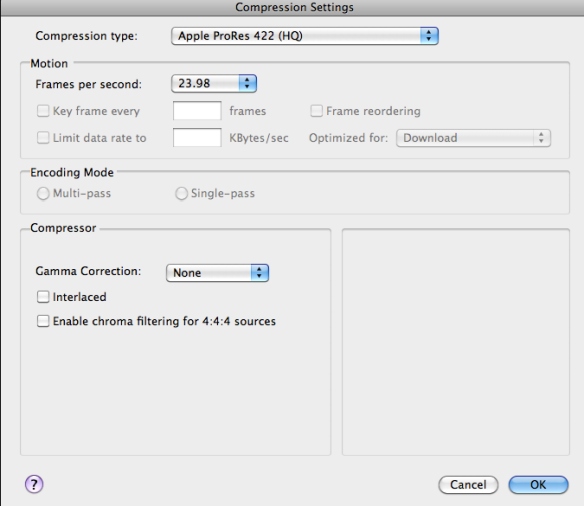
From here click on Compression Type and choose Apple Pro Res 422 HQ. You can choose plain Apple Pro Res but since were shooting RED I always try to go the highest quality possible.
Set your frames per second to 23.98 and set gamma correction to NONE.
When your done hit OK which will bring you back to your export screen. You can leave the resolution to 1980X1080 which should be default and the debayer settings should also be default at FULL. You can double check them if needed. When everything looks right click on Output location and choose Output with clip filename to selected folder.
Click select output folder and choose a folder or create a new one. This is where your transcoded files will be put into.
Once your done hit OK and your preset will be present at the top at Export Presets.
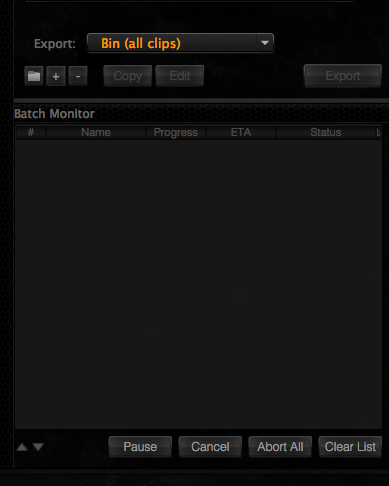
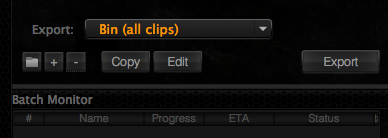
Make sure this is highlighted in orange then proceed to Export by clicking on (Export) Bin – All Clips.
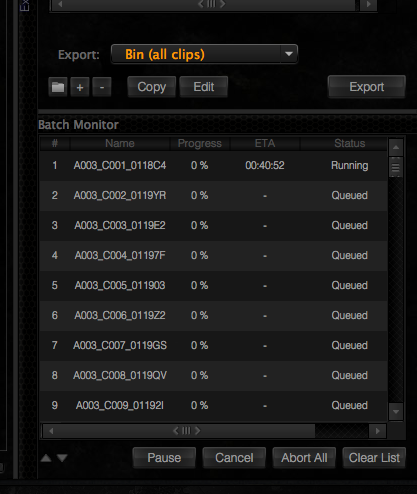
After that click on EXPORT and you are up and running.
Now you can import that into your FCP project and be ready to go. Hope this helps sir.

